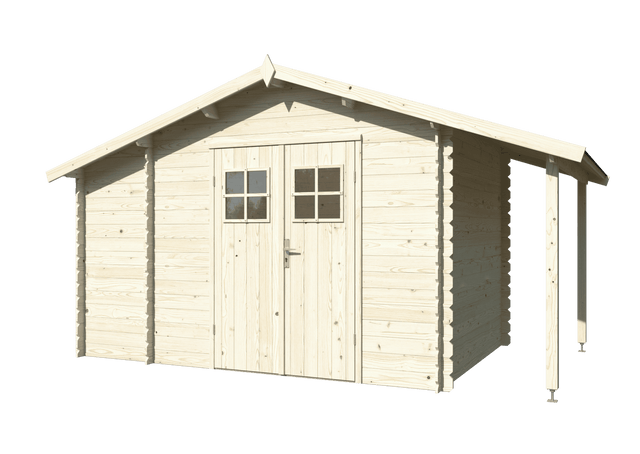
Painted vs Treated vs Untreated Garden Buildings
Unprocessed wood naturally weathers over time, turning grey and becoming susceptible to blue stain, mould, and decay. Treating the timber with preservatives protects it from fungi, insects, and moisture, helping extend its lifespan and appearance. Palmako’s in-house treatment options save you time and ensure consistent, high-quality protection for every product.
Why Choose a Pre-Painted Garden Building Kit?

Controlled Painting Environment
Every part is painted to ensure total protection. So forget about rain, humidity, pollen, or dust, our climate-controlled factory painting ensures the perfect conditions and paint drying temperature. The painted finish will last season after season.

Time and cost efficient
You'll have immediate protection from the moment of installation and longer lifespan than those painted post-assembly. No need to buy brushes, tarps, or ladders. No lost weekends or weather worries. Your new cabin arrives ready to just unpack, assemble, and enjoy.

No brush marks or uneven tones
Our cabins are painted with precision using high-quality professional equipment. Factory-applied coatings penetrate and seal the wood before assembly. This shields your cabin from moisture, UV rays, and fungus better.
We offer three types of surface treatment, depending on the product:
- Factory-painted;
- Dip-treated;
- Pressure-treated.

1 - Factory-Painted Cabins (Garden Rooms, Sheds, Garages, Playhouses, Saunas) - Painted Externally
We’ve invested in state-of-the-art painting robots that allow us to coat even complex products like log cabins with precision in a controlled environment. This ensures consistent coverage and durability that’s hard to achieve with post-assembly painting. The result is a cleaner, longer-lasting finish that’s ready to withstand the elements from day one.
Why Choose Factory Painted?
- Time and Cost Efficient: Painting is a laborious and costly task. Our pre-painted buildings bypass the need for you to undertake this effort.
- Longer Lifespan: Factory-painted buildings have a longer lifespan than those painted post-assembly because our buildings are painted under controlled conditions, ensuring a dry and optimal setting for paint application.
- Immediate Protection: From the moment of installation, your building is protected against moisture, which is crucial in the unpredictable British weather.
- Uniform Comprehensive Coverage: Achieves an even coat impossible to replicate with manual painting.

What is painted:
- Exterior Walls: Pre-painted with a durable finish.
- All Sides of Log Ends Painted: Ensures uniform appearance even as the wood dries, preventing unpainted areas from showing.
- Fully Painted Fascia Boards and Slats: All sides are coated in a stylish RAL7016 to complement any garden setting.
- Canopy walls: painted on both sides.
What is not painted:
- Internal walls, leaving you the choice to finish the interior the way you desire.
- Foundation beams.
- Floor boards.
- Roof boards.
- Rafters.

2 - Fully Painted Products (Gazebos, Carports, Lenna and Bianca Sets)
Our fully painted products are finished using advanced flow-coating and spray chamber technology to achieve a smooth, consistent surface. After painting, each product is carefully dried in a 30-metre controlled chamber, where conditions are precisely monitored for optimal results. This guarantees a durable, high-quality finish that stands the test of time.

3 - Dip-Treated (Available for Most Garden Rooms and Log Cabins)
We carry out our own dip treatment using Axil 3000 P by Sarpap & Cecil Industries — a water-based wood preservative that provides protection within use classes 1–3. The treatment helps protect against decay, mould, and insect damage, forming a reliable base for further finishing.
For best results, the dipped wood should be coated with at least two layers of topcoat as soon as possible. If left uncoated for more than six months, the protective properties will begin to diminish.

4 - Pressure-Treated (Available for Selected Sheds and Greenhouses)
Our pressure treatment process uses vacuum and pressure technology to ensure deep penetration of the preservative into the wood fibres. The treatment is carried out with Impralit®-KDS — a water-borne, chromium-free preservative that protects against insect attack, soft rot, and fungal decay, while also offering temporary resistance to blue stain and mould. It is suitable for use classes 1–4 as defined in EN 335-1, ensuring extended durability and long service life for our timber products.
You will find available treatment options next to each product under the Treatment section.
-
![]()
5 Year Warranty
-
![Ines M (3.2x4.1m | 11.1m2 | 44mm) Timber Sunroom with Double Glazed Bi-Fold Doors - Palmako UK]()
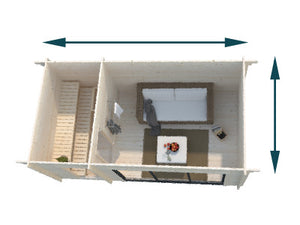
Internal area: 6.6sqm
-
![]()
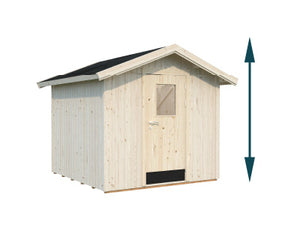
Total height: 228.0 cm
-
![]()
External dimensions: cm
-
![]()
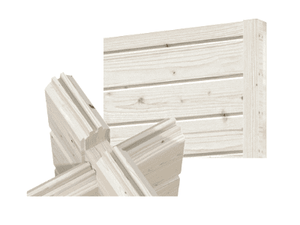
Walls:
-
![]()
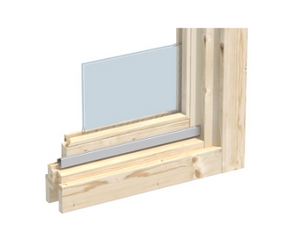
Glazing: Acrylic glass
Technical details
Technical details
Measurements
- Dimensions: cm
- Overall height: 228.0 cm
- Wall height: 194.0 cm
Walls:
- Construction type: Log
- Wall thickness: 19
Roof:
- Roof type: Apex roof
- Roof area: 11.3 m²
- Roof angle: 18.1º
- Overhang, front: 20.0 cm
- Overhang, back: 20.0 cm
- Overhang, sides: 15.0 cm
- Roof board thickness: 16.0 mm
Floor:
- Floor area: 6.6 m²
- Floor board thickness: 19.0 mm
- Floor beams: 45x70 mm
Doors and windows:
- Glass type: Acrylic glass
- Nr of windows:
- Nr of double windows:
- Window sizes: cm
- Nr of single doors: 1
- Nr of double doors: 1
- Nr of sliding doors:
- Door size: cm
Delivery and packaging
Delivery and packaging
- Nr of packages:
- Total weight: 442.61kg
Assembly instructions
Assembly instructions
Please read the assembly manual carefully before proceeding with the house installation! You will thus avoid problems and will not waste time.
Recommendations
- Keep the house package until its complete assembly in a dry place, but not in direct contact with the ground, protected from weather conditions (moisture, the sun, etc.). Do not keep the house package in a heated room!
- When selecting the garden house location, make sure that the house will not be subjected to extreme weather conditions (areas of strong snowfall or winds); otherwise you should attach the house (for instance, with anchors) to the subsoil.
- All timber elements are natural and need to be treated with wood protection products by the customer to resist weather effects.
For assembling you will need the following tools:
- assembly aid
- water-level
- knife
- ladder
- screwdriver
- measuring tape
- hammer
- saw
- pliers
- drill
- protective gloves
Preparation of components
Sort the components based on the wall plans (see Installation manual) and place them at the four sides of the house in the installation sequence.
Attention:
Never place the components directly on grass or a muddy surface because it will be very difficult or even impossible to clean them up later!
Garden house installation
Installing a garden house begins from preparing a perfectly level and square foundation. Pouring a concrete foundation is not essential for that purpose; lightweight construction blocks, concrete slabs or posts are also suitable as a base. They need to be dug partly into the ground and levelled before installing the house in order to prevent the house from sinking.
Every house has installation manual included, describing all the main installation stages and separately displaying the wall elements. You can see some of the installation manual by the product description on Palmako’s home page.
Foundation
Prepare the foundation so that its upper edge extends from the ground to a height of at least 5 cm and the foundation joists are propped up on every side with intervals not exceeding 50-60 cm. At the same time make sure that there are sufficient air apertures under the house floor for ventilation.
The following foundation options are recommended:
- Screw foundation
- Strip or spot (pile) foundation
- Foundation from concrete or pavement slabs
- Slab foundation (cast concrete bed)
The base frame of the house must be completely flat and level to ensure that the installation proceeds without problems.
Attention:
Different houses can have different foundation placements – see the appended base frame drawing (in Installation Manual)!
Take a look at the assembly videos
Our installation videos are made for illustrative purposes only and show general installation principles of a product group.
During installation you must always follow the product specific installation instructions that come with the product!
Treatment and care
Treatment and care
Wood is a natural material, growing and adapting depending on weather conditions. Large and small cracks, colour tone differences and changes, as well as a changing structure of wood are not errors, but a result of wood growing and a peculiarity of wood as a natural material.
Unprocessed wood (except for foundation joists) becomes greyish after having been left untouched for a while, can turn blue and become mouldy. To protect the wooden details of your product, you must immediately process them with a wood preservative or use the product treatment service that Palmako gladly offers.
It is recommended that you cover the floor boards in advance with a colourless wood impregnation agent, especially the bottom sides of the boards, to which you will no longer have access when the house is assembled. Only this will prevent moisture penetration.
It is also recommended that you process the doors and windows as well with a wood impregnation agent, and do that namely both inside and outside! Otherwise the doors and windows can become twisted.
After the product assembly is completed, a weather protection paint that will protect wood from moisture and UV radiation is recommended for the conclusive finishing.
When painting, use high quality tools and paints, follow the paint application manual and manufacturer’s safety and usage instructions. Never paint a surface in strong sunlight or rainy weather. Consult a specialist regarding paints suitable for unprocessed softwood and follow the paint manufacturer’s instructions.
Having been properly painted, your product’s lifetime will increase substantially. Palmako recommends that you inspect the house thoroughly once every six months.
Warranty
Warranty
Sales and Warranty Terms and Conditions
Over the last 20 years, Palmako has produced over half a million wooden houses. In Palmako’s production, only the latest technology is used to make no compromises on quality and to make sure that nature and its resources are handled in the best possible way.
Palmako places a 5-year warranty on Palmako’s wooden buildings and a 2-year warranty on Palmako’s playgrounds and swings for your complete peace of mind.
Palmako products are manufactured in accordance with high-quality norms. Parts have been carefully inspected and packed. In order to avoid possible problems, it is recommended that you inspect the delivery for its completeness in accordance with the list of parts before assembly. This inspection must be carried out within 14 days after delivery. Warranty claims are limited to the exchange of defective parts. Defective parts, which have been used or treated, are excluded from being replaced. All further claims are excluded! In the case of complaints, please pay attention to the following procedures: please present the inspection certificate along with the sales receipt to your place of purchase. Only in cases where these documents are presented will the complaint be dealt with quickly and without complications.
Please be sure to keep the packaging and accompanying documents of the product!
Keep the product and packaging in a dry place, but not in direct contact with the ground, protected from weather conditions. To protect the wooden products, you must immediately treat them with a wood preservative and provide regular maintenance.
There may be errors and technical differences in the data and files displayed on this website.
During installation you must always follow the product specific installation instructions that come with the product!
Warranty events
- design defects;
- missing components;
- the use of materials not in compliance with the applicable quality requirements as well as all other defects in the product that would result in the lack of conformity of the product with the contract.
The warranty does not cover
- peculiarities of wood as a natural material;
- wooden details already painted (processed with a wood preservative);
- wooden details containing whole branches that do not endanger the stability of the product;
- colour tone variations caused by wood structure differences that do not influence wood lifetime;
- wooden details containing (caused by drying) small cracks/gaps that do not pass through and do not influence the structure of the product;
- twisted wooden details if they can nevertheless be installed;
- roof and floor boards that may have on their concealed surfaces some non-planed areas, colour differences and waning;
- complaints resulting from an incompetent manner of installation of the product;
- defects of the product caused by the wrongful handling or use of the product, its components or materials or the failure to comply with the requirements for storage and maintenance of the product by the buyer;
- complaints caused by introducing self-initiative changes to the product;
- defects of the product caused by humans, animals or forces of nature, natural disasters or other events having catastrophic consequences:
The complaints covered by the warranty are satisfied to the extent of replacing the deficient/faulty material. All other demands will be excluded!
Assembly video
*This is an illustration on how this type of products are assembled. Please refer to user manual for detailed assembly instructions.

